Disassembly
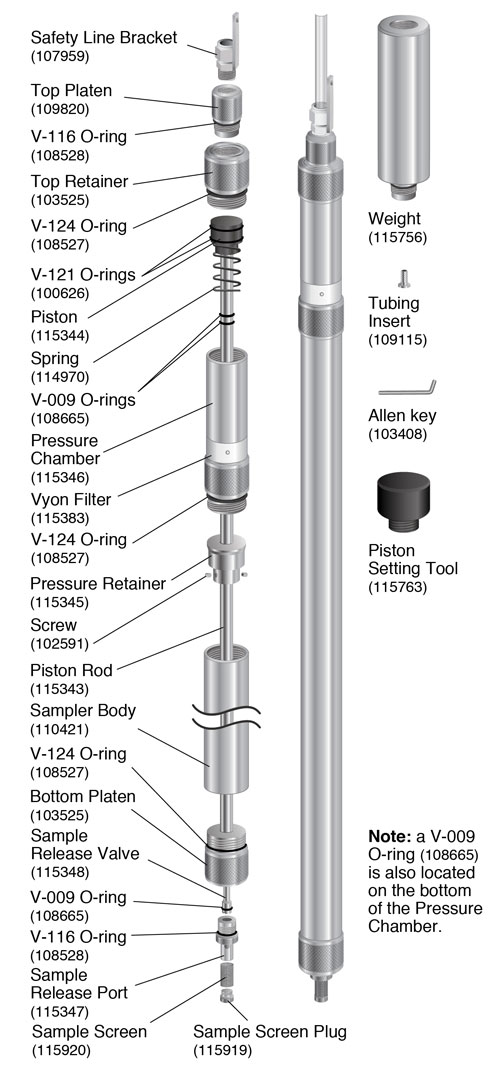
- Unscrew the Sample Screen Plug and remove the Sample Screen from the Sample Release Port.
- Use a standard screwdriver to unscrew Sample Release Valve from the Piston Rod and remove from the Sample Release Port.
- Unscrew the Sample Release Port from the Bottom Platen and unscrew Bottom Platen from the Sampler Body.
- Unscrew the Sampler Body from the Pressure Chamber.
- Unscrew the Top Platen from the Top Retainer. Or, if weights have been used, unscrew the Top Platen from the weight and unscrew the weight(s) from the Top Retainer.
- Unscrew the Top Retainer from the Pressure Chamber.
- Use the Allen Key to loosen the screws in the Pressure Retainer and slide the Pressure Retainer off the Piston Rod.
- Holding the Piston Rod firmly, push the Piston out of the Pressure Chamber.
Decontamination
Notes:
- Always follow your local guidelines and standard protocols.
- Replace worn o-rings. Never use Acetone on the o-rings.
The Discrete Interval Sampler should be decontaminated after each sampling event.
- Disassemble the Sampler.
- Wash all Sampler parts in a phosphate-free soap.
- Rinse all parts thoroughly with deionized water and dry.
- Reassemble the Sampler.
Assembly
- Ensure there are two V-009 O-rings on the Piston Rod and two V-121 O-rings on the Piston Head.
- Slide the Piston Rod through the Pressure Chamber and with some force, pull the Piston Rod until you feel the two O-rings on the Piston seat inside the Chamber.
- Ensure there is a V-124 O-ring on the Pressure Chamber.
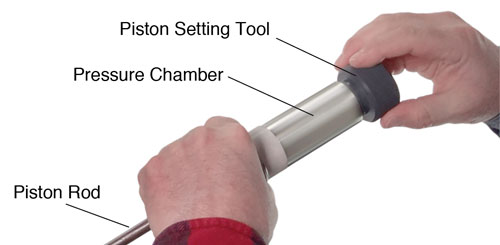
- Push the Piston Setting Tool into the Pressure Chamber and thread the Tool into the Pressure Chamber until it seats.
- Slide the Pressure Retainer firmly against the Pressure Chamber, to cover the V-009 O-ring at the vent hole. Use the Allen Key to tighten the Pressure Retainer in place.
- Remove the Piston Setting Tool.
- Put the Piston Rod through the Sampler Body and screw the Sampler Body onto the Pressure Chamber.
- Ensure there is a V-124 O-ring on the Top Retainer and thread it into the Pressure Chamber.
- Ensure there is a V-116 O-ring on the Top Platen and thread it into the Top Retainer (see Page 1 if using weights).
- Ensure there is a V-124 O-ring on the Bottom Platen and thread it into the Sampler Body.
- Ensure there is a V-116 O-ring on the Sample Release Port and thread it into the Bottom Platen.
- Ensure there is a V-009 O-ring on the Sample Release Valve and insert it through the Sample Release Port and thread it into the Piston Rod. Use a standard screwdriver to tighten it until just snug.
- Place the Sample Screen over the Sample Release Port and screw the Sample Screen Plug into the Sample Release Port.


425-D Deep Sampling Discrete Interval Sampler (115342)


 German
 English